*Originally written for A Cherry on Top*
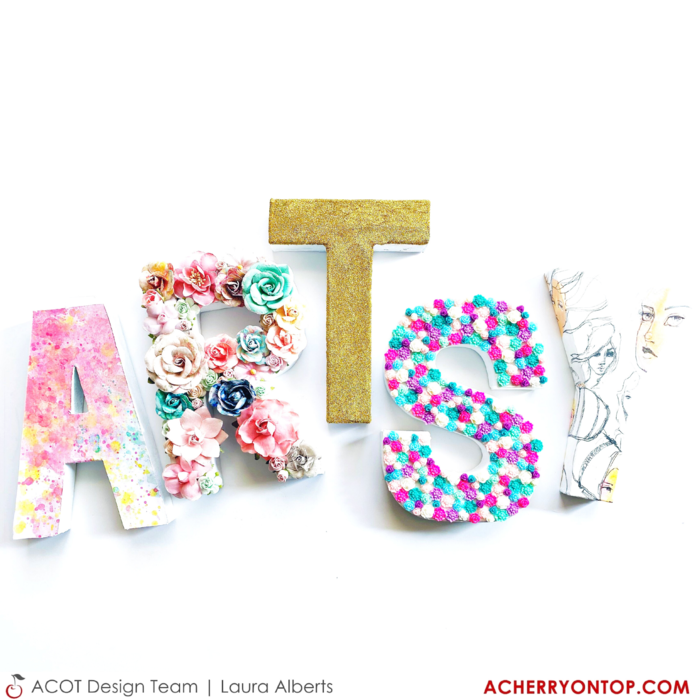
Have you every seen the large, decorated letters often used in fancy décor? I love the look of them and the personalized touch they add to a room, so I tried five different ways to decorate them and I love them all!
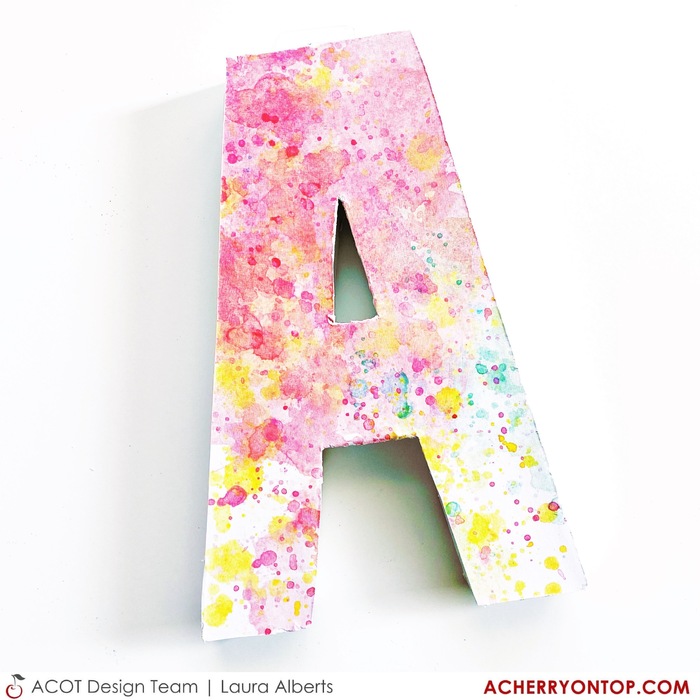
First, I prepped the letters altogether to keep it easy. I painted the sides and tops of each letter with a layer of white gesso, then a coat of white acrylic paint. The gesso helps seal the paper mache and keep it protected, while the acrylic paint is opaque enough to color the letters white. With the ‘A’, I simple added a coat of matte gel medium to the top of the letter and pressed it down on top of patterned paper with a “painted” look! This page came from Vicki Boutin’s pre-made mixed media pad. Next, I roughed up the edges when I cut it out to give it more texture and then sealed it with matte gel medium.
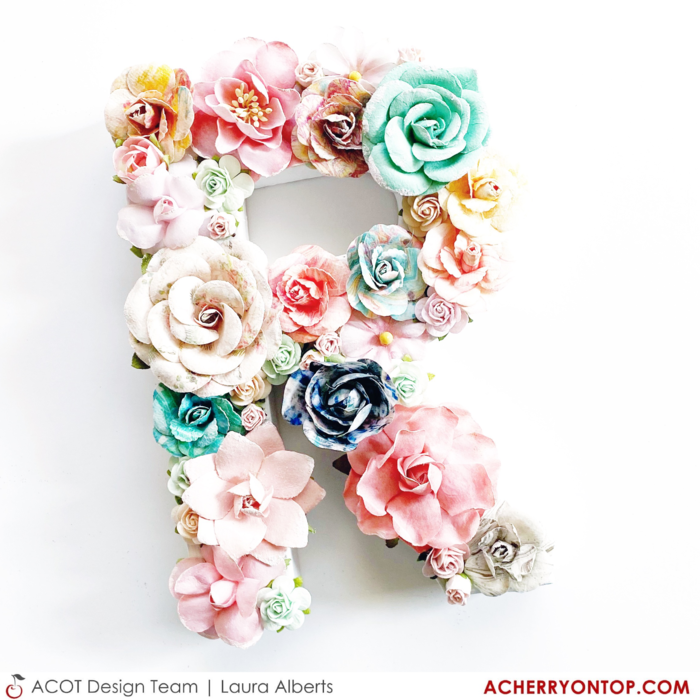
For the ‘R’, I decided to go wild with a few packs of Prima flowers! I adore the look and texture these florals added to this letter. I painted the top of the ‘R’ with a layer of Prima’s 3D gel medium (needs to have a pretty heavy body gel medium to get a strong hold!) and then pushed the flowers into the gel, holding it firmly until I was sure it was secure. Starting with the large florals so that I was sure they had plenty of room, then filling in the openings with smaller and smaller florals.
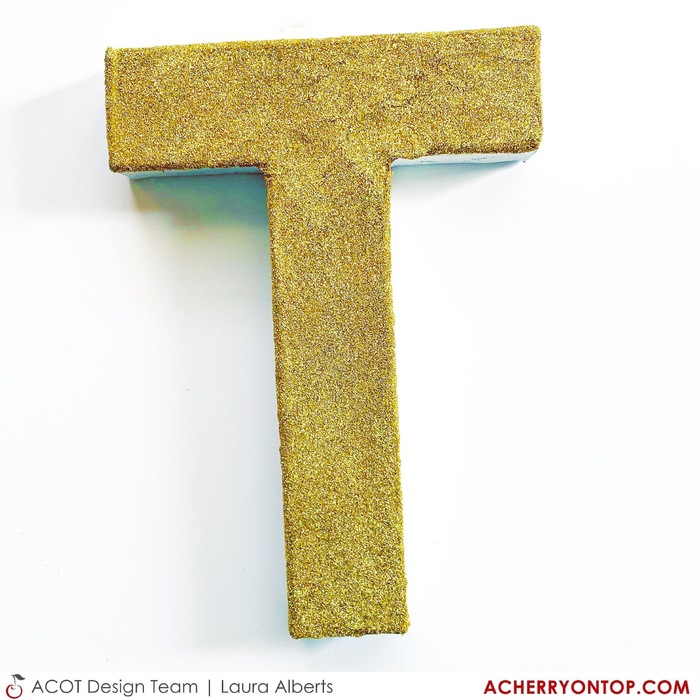
Up next was the ‘T’ and I thought it needed some bling! I painted the top of the letter with matte gel medium and then covered it liberally with Wow Glitter in gold! Now, this one is a project to set up and walk away from as it takes quite a while to dry, but when you come back and shake off the excess glitter, it’s stunning! You can seal in the glitter once it’s completely dry with hair spray.
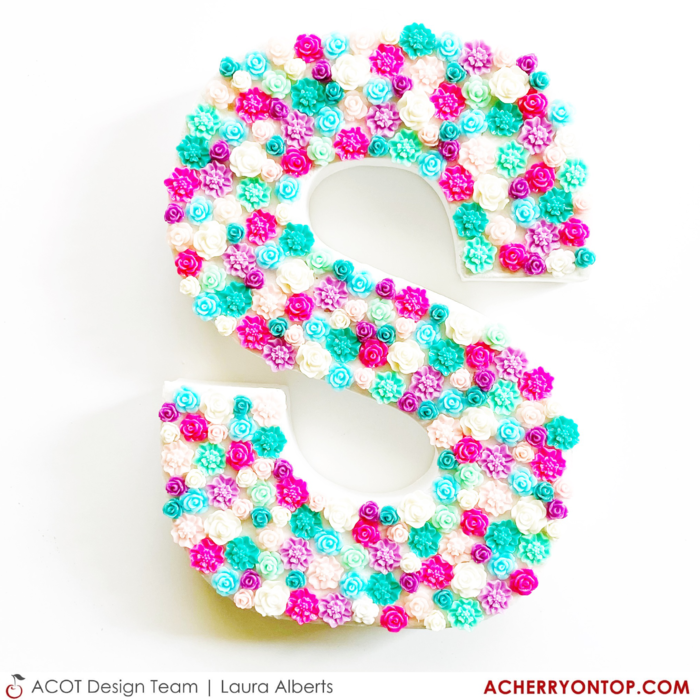
With the ‘S,’ I took on an ambitious idea to fill the letter with resin flowers! Using the Prima 3D gel medium again, I painted a thick layer onto the top of the letter ‘S’ and then stuck the flowers wherever they would fit, puzzling them together to fill in the entire space! This one might be my favorite because it looks amazing!
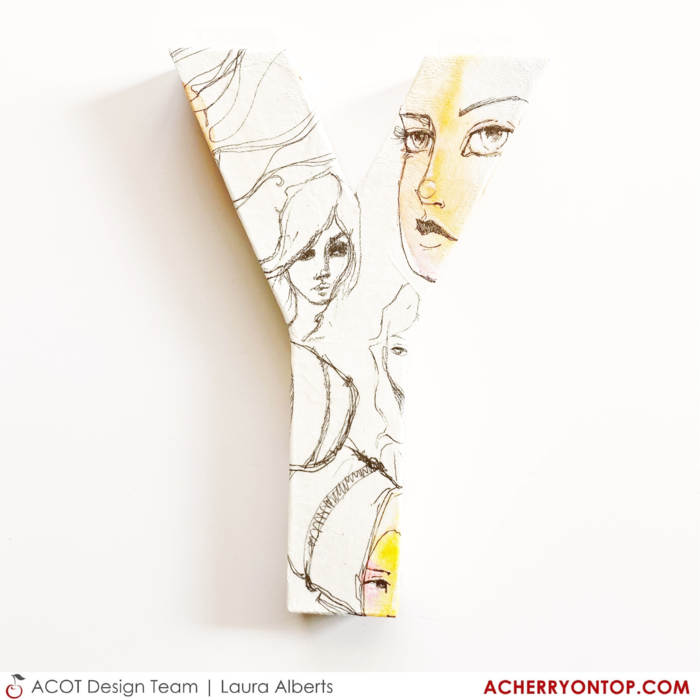
Now, for the Y, I wanted to try something a bit different. I dug deep in my stash for some Jane Davenport tissue paper and using a thin layer of matte gel medium, affixed it to the top and sides of my letter. I added another layer of matte gel to seal it in and protect the tissue long-term. It looks like the design was drawn directly on to the letter! Such a cool effect!
I hope these crafty ideas for decorating letters inspire you to give this project a try too! You can use your initials, spell a meaningful word, or even your kids’ names! To see this project come together, check out the process video below!
Thanks for stopping by!

No comments:
Post a Comment