Thursday, July 30, 2020

"So Epic" | Legendary Collection | Cocoa Vanilla Studio


Hey y’all! Laura here with a really fun take on this amazing mandala design on the Explorer paper from the Legendary Collection. I wanted to see if I could use both the inside and outside of this gorgeous design on two separate layouts! This idea has been floating around in my head for ages, so I decided to dive in and give it a go!

Once I finished fussy cutting out the mandala pattern inside, I pulled together two different sets of photos, one for a busy layout and one for a simple layout. I figured the contrast between the two designs would be a fun juxtaposition! For the first layout, I layered in plenty of scraps and even used the part of the orange One Way paper that wouldn’t show to mat my photos! Love when I can get the absolute most use out of my papers, especially the gorgeousness from Cocoa Vanilla.

I had quite a bit of journaling to add to these photos, so I ended up using three label stickers from the 6×12 accessory sticker sheet to create spots for the details around the page. Anime is a huge interest for two of my kids at the moment, so the opportunity to see people dressed as their favorite characters was a thrill! And this wild, layered background was the perfect backdrop for these photos, pulling the bright orange and blues in together. Adding in the very appropriate “So Epic” title and the little stream of stars around each of my two clusters was a fun way to finish it off!

For my second layout, I backed the frame of the mandala with the Epic Tales paper, then adding a border of the bright orange One Way paper to give that blue a pop of excitement! Using many of the circle elements in the ephemera pack, I backed a few with scraps and layered them in with my photos of a Scouts fishing trip. My goofy son’s silly antics are some of my favorite pictures to scrap and these were no different! I did have to take the design all the way to the edge on the right to cover up where I cut through to the mandala, but overall, I think it turned out pretty cool!

I hope this double layout from one pattern inspired you to look at your patterned papers a little differently! It’s fun to see how you can use every little piece up in a new way. If you’d like to see the So Epic layout come together, I have the entire process in the video below! 

Thanks for stopping by!


Thursday, July 16, 2020

Quick & Easy Birthday Cards | ACOT DT

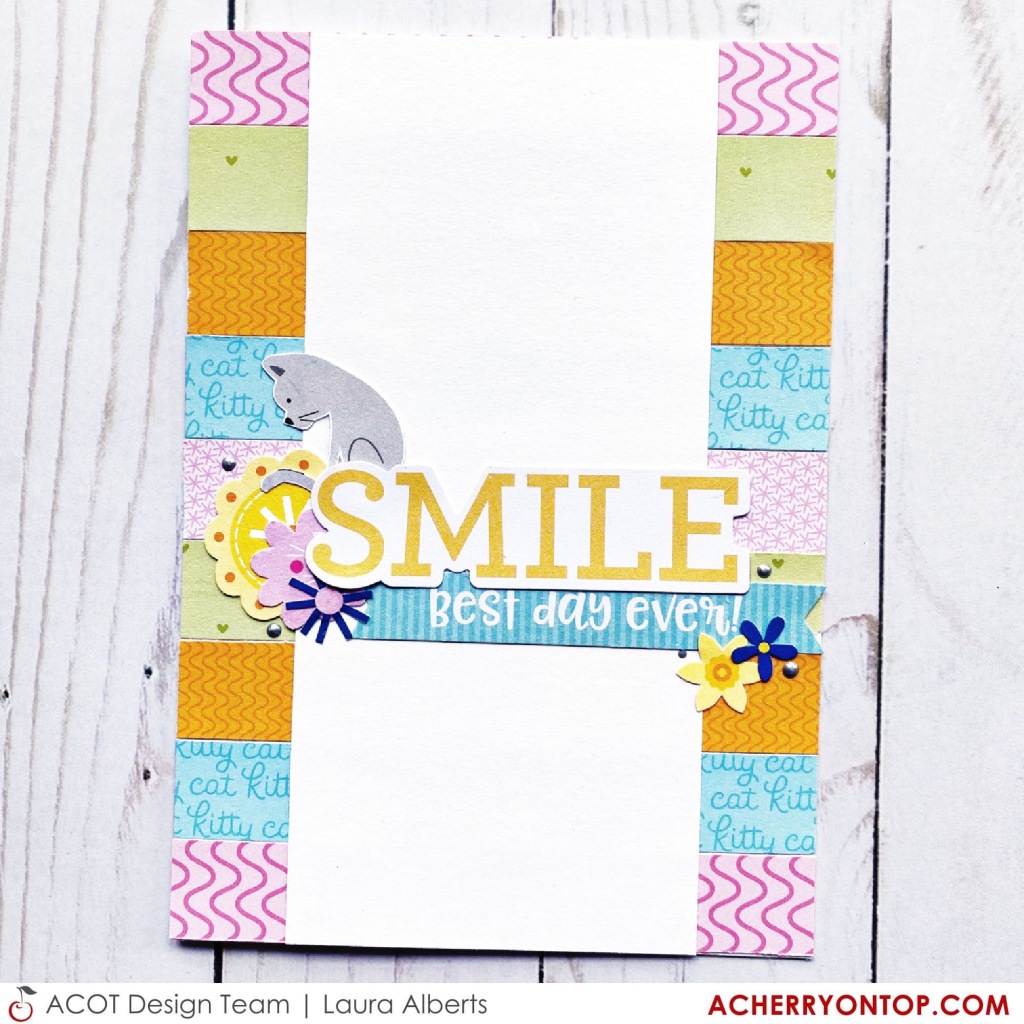
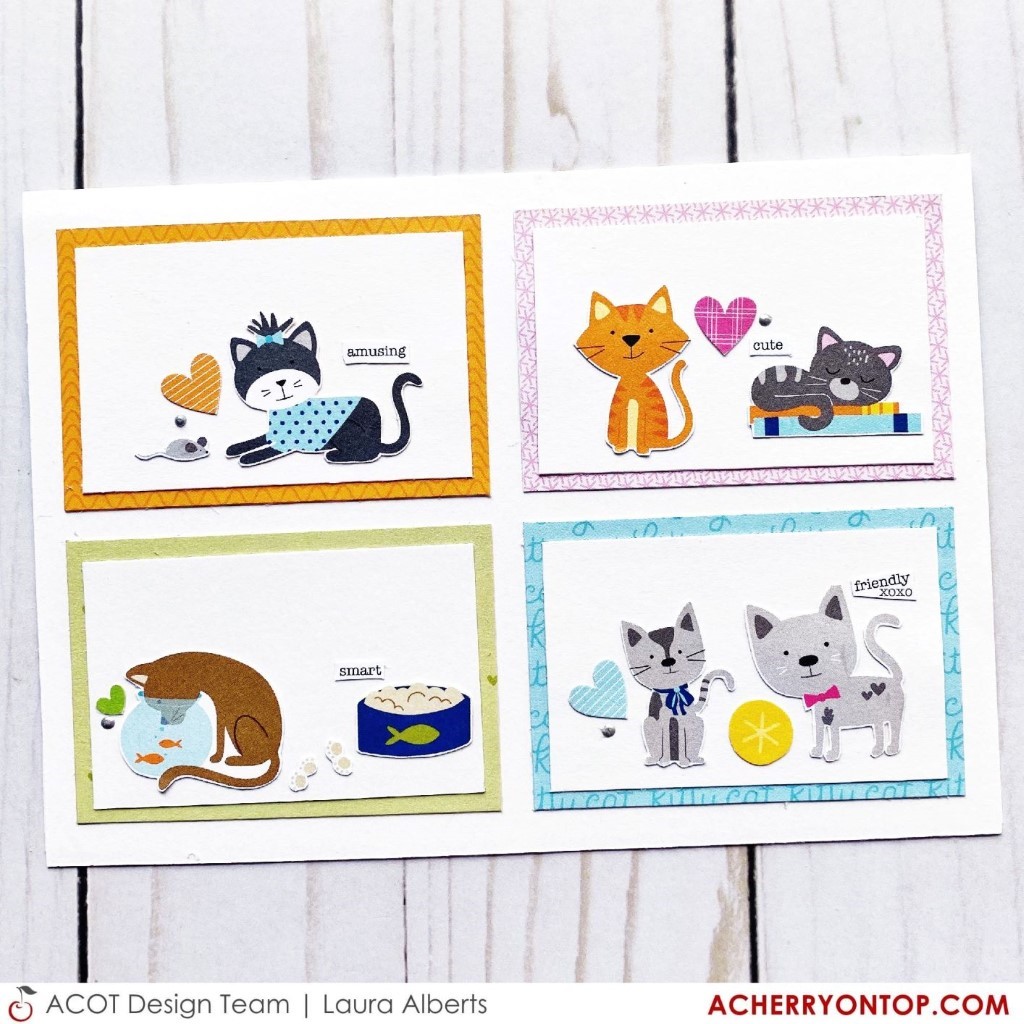
Welcome back to the Cherry Blog! Have you ever had to throw together a card last minute? I know I have! For today’s project, I thought it would be helpful to offer some quick and easy (no mess!) designs that can get you out of a bind! These darling birthday cards feature the new Bella Blvd Chloe collection, but you could easily substitute the cats for florals, hearts, stars, etc. Whatever you have on hand will work, I promise! 

This first card is a layered grid and it is so much fun to put together! Layer two pieces of simple patterned papers then build your grid right on top! Each grid has a sweet little kitty face in it, then a simple sentiment from Doodlebug’s Simply Spring Chit-Chats. If you’re a card maker, Doodlebug Chit-Chats are the best for sentiments! 

This card is brilliant for using up scraps! I layered scraps all down the back of my card, then topped with white cardstock to make my sentiment POP! Of course, I had to add a curious kitten in amongst the florals. The florals are fussy cut from the Chloe collection and a little touch of Silver Lining Nuvo Crystal Drops really gives it a finished look! 

This card is my absolute favorite of the bunch! For each grid, I layered patterned paper and then cardstock, then created a little scene using the cats and icons from the collection. I think this one turned out super cute! 

This last one was inspired by the cut-apart sheet with this super cute “You’re a Cool Cat” piece. It just begged to be on a card! Lots of layering with this one and including Doodlebug sentiment. I think this one is perfect for a super cool kiddo! 

I hope this sweet little card set inspires you to try some of these quick and easy designs on your next card! No mess, no frustration, but cute cards nonetheless! To see these cards come together, check out the process video below! 

Thanks for stopping by!


Friday, July 3, 2020

"Even Superheroes Need Naps" | Cocoa Vanilla Studio DT


Hey y’all! Laura Alberts here again with a fun way to use up those scraps at the end of a project! I find cut files are brilliant for finishing off those little scraps you might otherwise throw away and with a giant title like this one from COAPA, those scraps can really shine! I have really enjoyed scrapping tons of photos with the new Legendary collection, but this mixed media style background paper has to be my absolute favorite in the entire collection. It’s called “Offbeat” and I think it framed this cut file beautifully!

I kept the embellishing pretty simple on this layout, so as not to compete with the photo or title design, but I did squeeze in a few stars (and stripes!) anyway. Stars are a great shape for boy layouts and one that has become my go-to for masculine pages. Clustering them is super simple, they tuck into each other at the corner of a label or word phrase sticker (or both!) as well as peeking out from behind larger design elements.

The best part of any layout for me is always those tiny details that finish it off. In this case, I used a combination of enamel dots and Nuvo drops to add a bit of interest to my clusters and then added to the splattered background with even more splatters in gold! I hope you find inspiration to use your scraps too, whether it’s backing a cut file or layering behind your photo. To see this layout come together, check out the process video below!

Thanks for stopping by!


Wednesday, July 1, 2020

July 2020 ACOT Hop

Welcome to the July 2020 A Cherry On Top Hop! This month our design team focused on the new Speckled Egg color released from Tim Holtz. Each of us have incorporated this spring-themed color into our creations! I chose to try out the Speckled Egg Distress Oxide on my layout along with Pinkfresh Studio’s Let’s Stay Home Collection.

To get started, I cut out the cover of the Pinkfresh collection and used that as the patterned paper backdrop. Using a Vicki Boutin stencil to create a background, then layering the sample cover on top! My photo sits on the top left corner with an ephemera title.

On a majority of the the leftover tiles, I added puffy stickers and ephemera to dress them up a little bit. It was a great way to use up these tiny frames from the ephemera pack, especially! After a few Nuvo Crystal drops around the embellishments, I added little bit of scattering and splattering around the edges finishes off the layout.

If you’d like to see this layout come together, I’ve included the process video below!

Thanks for stopping by!